1 Prologue
I regained my old Apple iBook G4 from around 2005, which I liked very much back in the days. As I didn't find any usable Linux distribution, I ended up installing OpenBSD 6.8. It is quiet simple to install, but be sure to have a look at the marvelous installation notes.
What works:
- Sound (speaker + earphones)
- Network, DVD, USB
- Wireless LAN
- X11
- Power off
- Display brightness regulation
- Standby, suspend and hibernate
2 Installation
I chose a DVD as the installation medium and used an image which contains all file sets: install68.iso. It's a good idea to plug in the network cable during the installation, because WLAN won't be available due to missing firmware. At boottime, just hold the alt + apple + o + f keys to enter the open firmware. At the boot prompt, type in the following:
boot cd:,ofwboot /6.8/macppc/bsd.rdNow a standard OpenBSD installation starts, there is not much to say about it. For disk partitioning I went with Whole disk → Custom layout:
#                size           offset  fstype [fsize bsize   cpg]
  a:          1024.2M             4096  4.2BSD   2048 16384 12958 # /
  b:          1024.2M          2101664    swap                    # none
  c:         28615.8M                0  unused
  d:         10240.5M          4199328  4.2BSD   2048 16384 12958 # /usr
  e:          1024.2M         25171776  4.2BSD   2048 16384 12958 # /var
  f:          1024.2M         27269408  4.2BSD   2048 16384 12958 # /tmp
  g:         14276.4M         29367072  4.2BSD   2048 16384 12958 # /home
  i:             1.0M                1   MSDOS
NOTE: Don't delete the MSDOS partition
i, or your system is unable to boot!
3 Firmware
If you haven't used wired network during the installation, you now have to install the needed firmware for graphics and wireless lan by yourself:
# fw_updateNow let's check if it was successful:
# fw_update -i

Installed: bwi-firmware-1.4p5 radeondrm-firmware-20181218
The installation is now complete, let's head over to the configuration.
4 wscons
Console keyboard and display settings are done via /etc/wsconsctl.conf:
keyboard.encoding=de.nodead
keyboard.map+="keycode 10 = less greater bar"
display.screen_off=60000
display.kbdact=on
display.msact=on
display.outact=off
display.vblank=on
I added the pipe symbol to the
< key, accessible with alt + <.
5 Advanced Power Management (APM)
To get the maximum "performance" out of your machine, use apm:
# rcctl enable apmd
# rcctl set apmd flags "-H"
# rcctl start apmd
6 Sound
Sound works out of the box, it just needs to be unmuted:
# sndioctl output.mute=0
# sndioctl output.level=.5
7 X11
I have a german Apple keyboard layout, which looks like that:
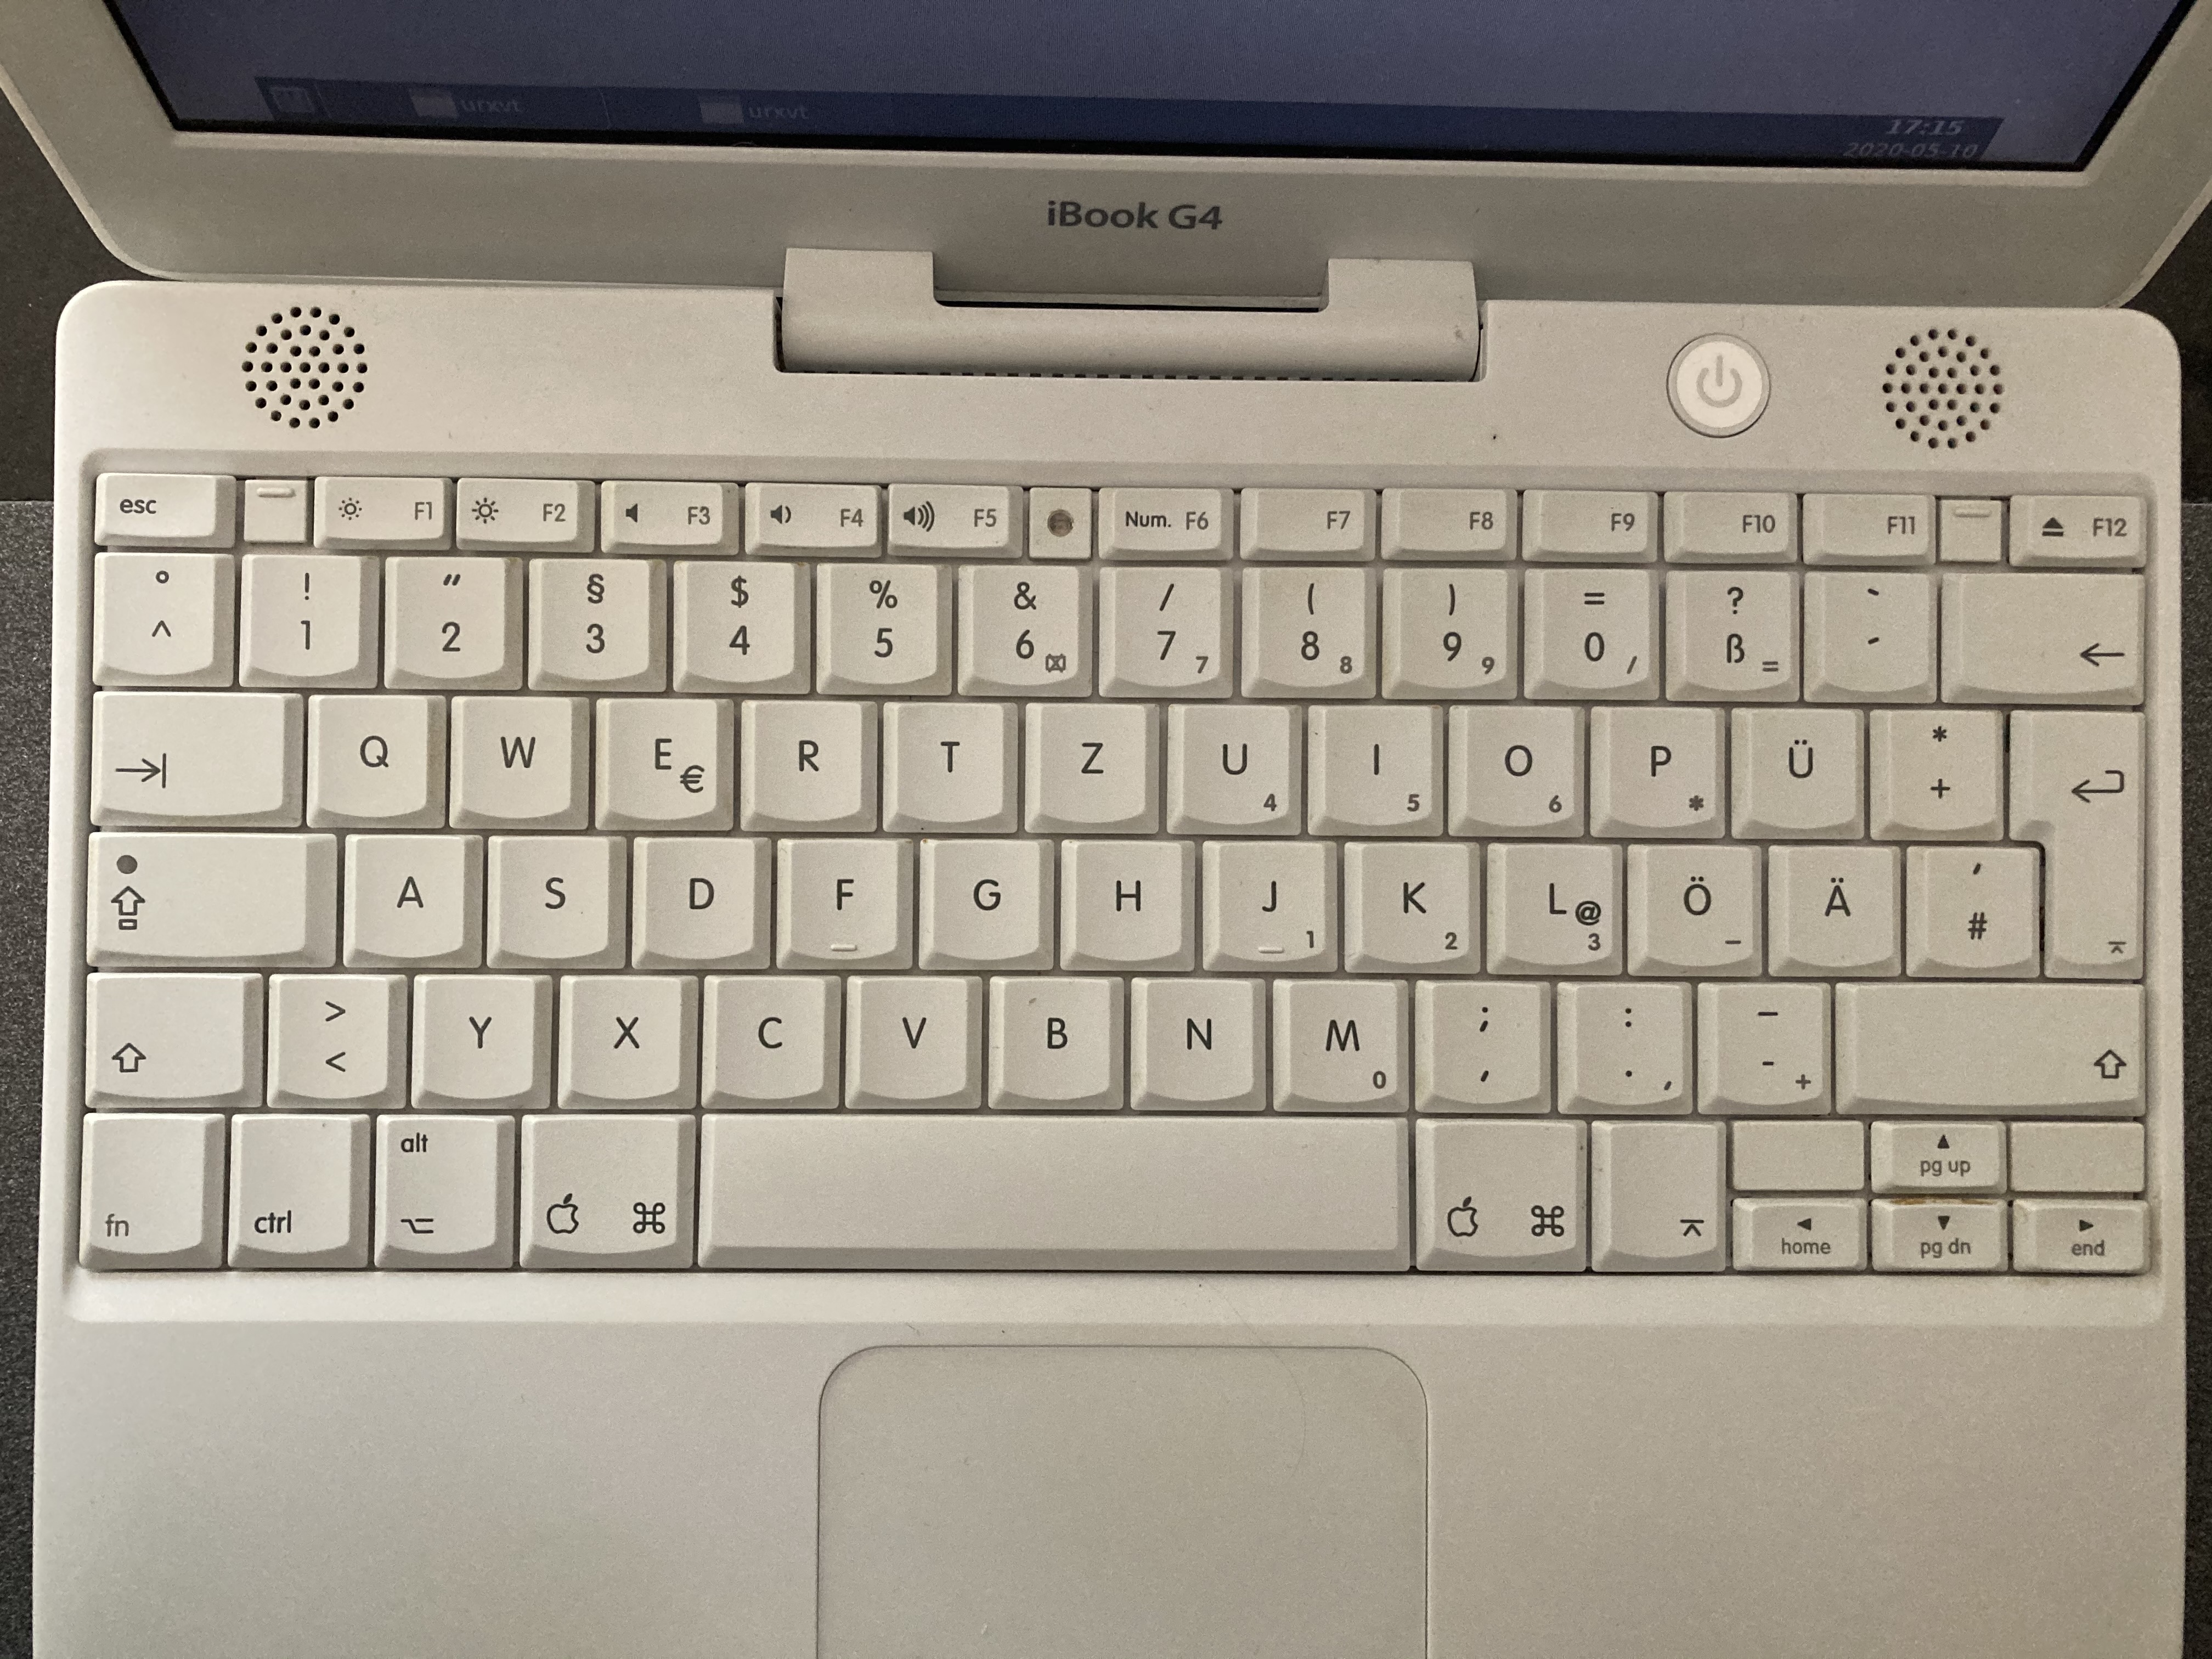
Getting a useful keyboard mapping is a little bit of an adventure. First create a file called 20-keyboard.conf in /usr/X11R6/share/X11/xorg.conf.d/:
Section "InputClass"
  Identifier "XKB Defaults"
  MatchIsKeyboard "yes"
  Option "Protocol" "standard"
  Option "XkbRules" "base"
  Option "XkbModel" "macintosh"
  Option "XkbLayout" "de"
  Option "XkbVariant" "nodeadkeys"
  Option "XkbOptions" "terminate:ctrl_alt_bksp"
EndSection
I ended up adding the following lines to my
~/.xsession file:
# fixes for a german ibook g4 keyboard layout
xmodmap -e "keycode 20 = ssharp question backslash"
xmodmap -e "keycode 22 = BackSpace BackSpace Delete"
xmodmap -e "keycode 24 = q Q at"
xmodmap -e "keycode 26 = e E EuroSign"
xmodmap -e "keycode 35 = plus asterisk asciitilde"
xmodmap -e "keycode 46 = l L at"
xmodmap -e "keycode 66 = NoSymbol NoSymbol NoSymbol"
xmodmap -e "keycode 94 = less greater bar"
xmodmap -e "keycode 108 = Mode_switch NoSymbol Mode_switch NoSymbol Mode_switch"

# mode_switch + escape = right mouse button"
xmodmap -e "keycode 9 = Escape NoSymbol Pointer_Button3"
xkbset m
xkbset exp =m

# window manager
xsetroot -solid darkgrey
exec fvwm
The keyboard mapping is now close to a standard german ISO layout. If you need keycodes,
xev is your friend. I mapped the bottom right enter key to Mode_switch. As there is no right mouse button on the keyboard, I'm emulating one with Mode_switch + ESC.
Don't forget to install xkbset:
# pkg_add xkbset
Now all that's left is to enable and start xenodm:
# rcctl enable xenodm
# rcctl start xenodm
And we are done!
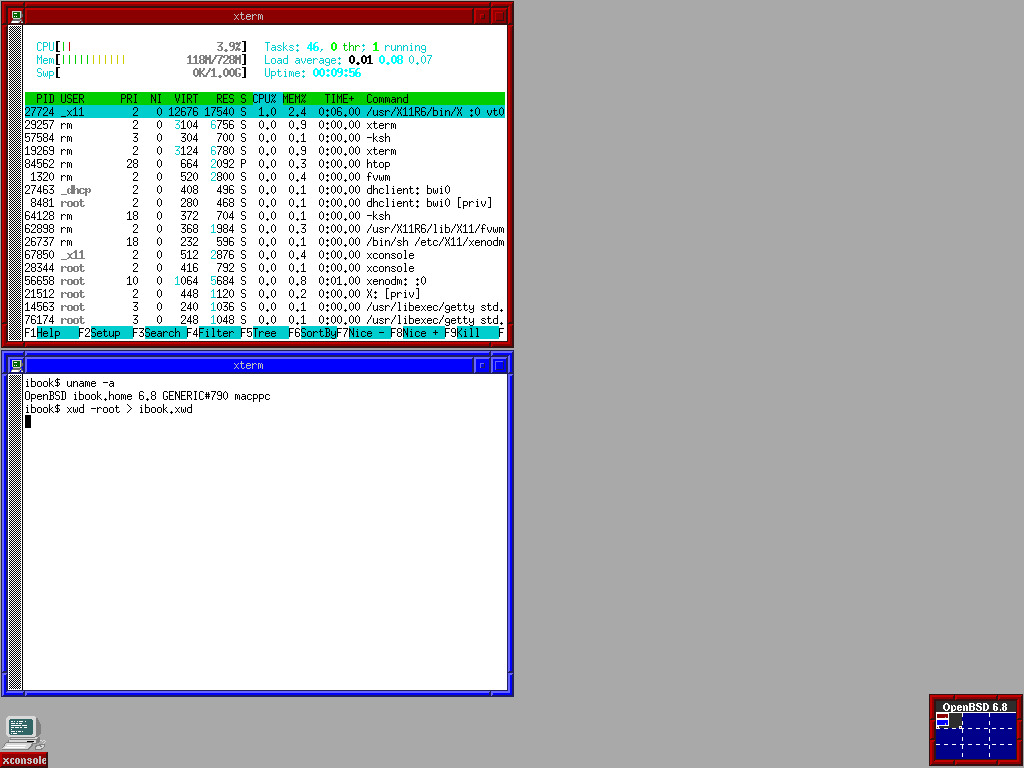
8 Screenshot
9 DVD / CD-ROM usage
To mount a CD / DVD:
# mount /dev/cd0c /mntUnmount and eject:
# umount /mnt
# eject /dev/cd0c
The eject key (
F12) does work too ;)
10 Minor hints
- Switching the console is a little bit tricky the first time you try it, because you first have to press
CRTL+ALTand hold them, then press and holdFNand thenFx. X11 is on position 5. - Sometimes WLAN stops working, give it a kickstart:
sh /etc/netstart bwi0 - If the machine is loosing its wlan link too often, just leave a ping running in the background:
ping -i 10 <host>